How to Ensure Windows' Ransomware Protection is Enabled
Controlled Folder Access is the easiest way to stop ransomware, but isn't enabled by default.
Windows devices are often a major target for ransomware (malicious software that holds files hostage by encrypting them and then demanding a ransom to decrypt them). Ransomware on Windows has become so prolific and devastating that starting in late 2017, Microsoft began shipping a new feature called Controlled Folder Access to offer expanded protection against this type of attack.
Controlled Folder Access is available on Windows 10 (version 1709 or later) and all versions of Windows 11, but it is not enabled by default.
What Is Controlled Folder Access?
Controlled Folder Access is a feature of Microsoft’s Windows Defender Antivirus that is designed to protect unknown or unvetted software programs from altering important documents, photos, and other files.
Like other optional security features, Controlled Folder Access enables end users to trade a bit of convenience for stronger assurances against their files being altered by malicious software. This trade-off is also why it is disabled by default.
Once enabled, Controlled Folder Access protects the integrity of the following folders:
C:\Users\<username>\DocumentsC:\Users\Public\DocumentsC:\Users\<username>\PicturesC:\Users\Public\PicturesC:\Users\Public\VideosC:\Users\<username>\VideosC:\Users\<username>\MusicC:\Users\Public\MusicC:\Users\<username>\Favorites
end users and administrators are welcome to add additional paths to this list.
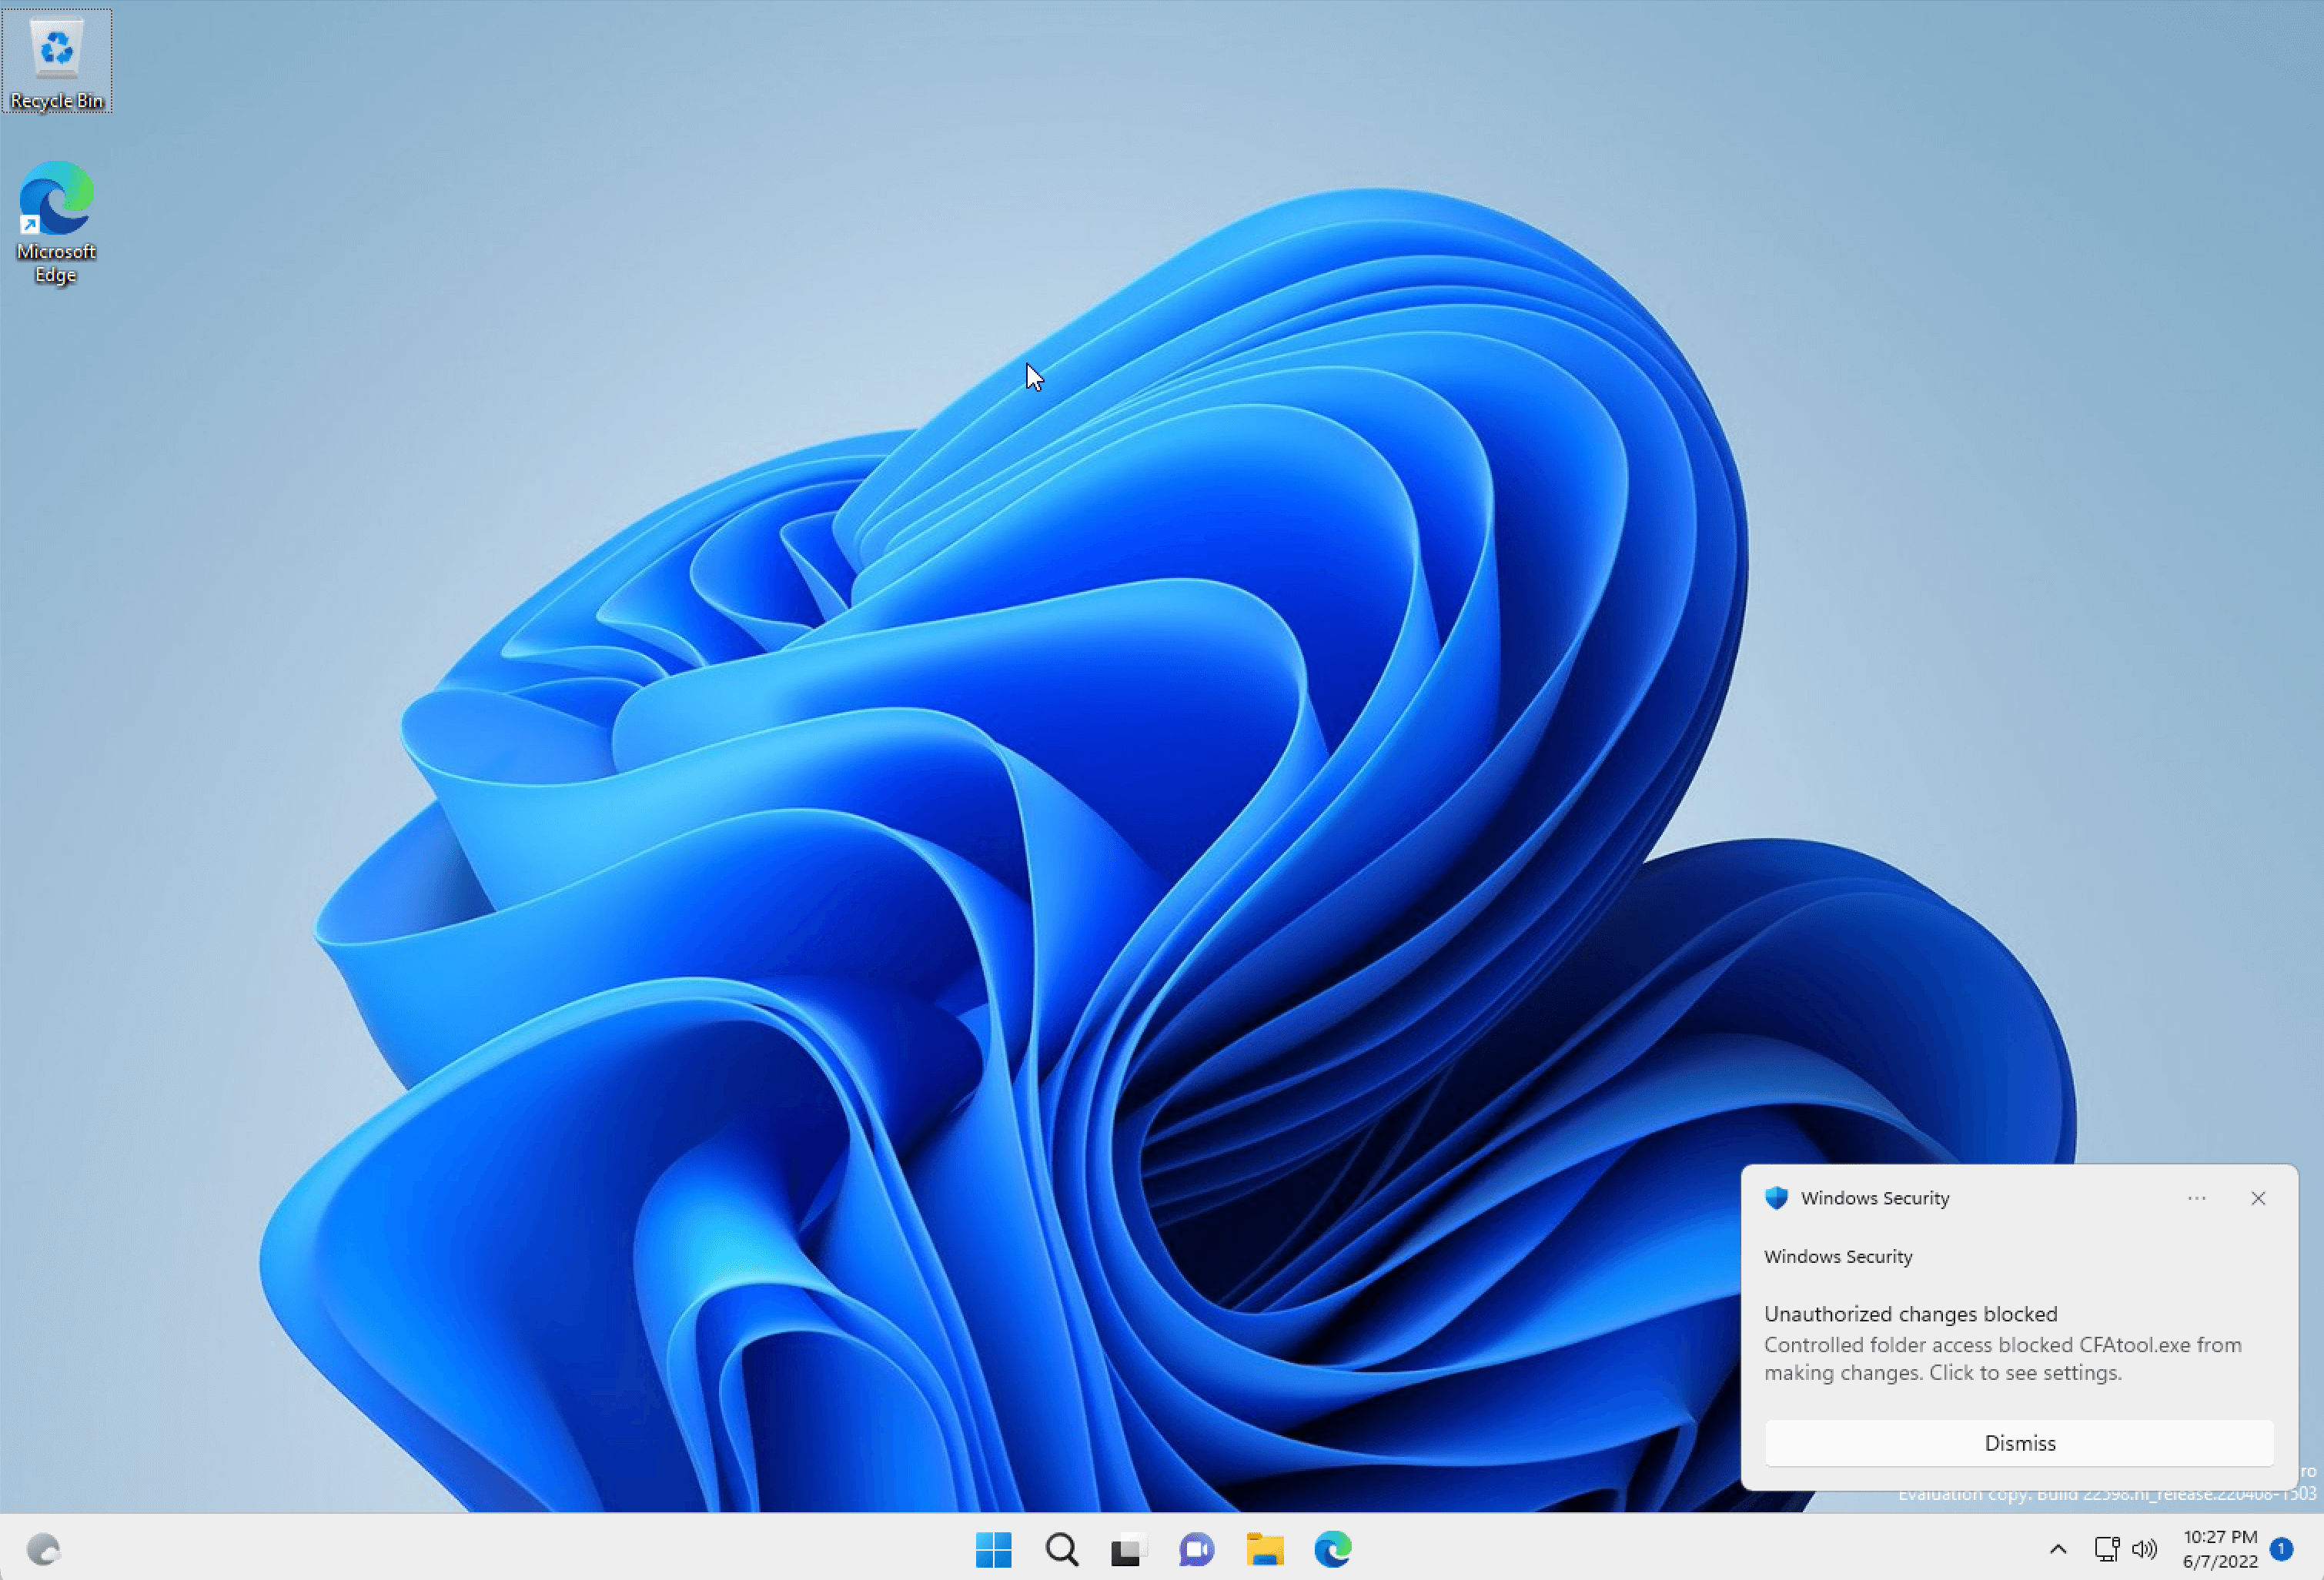
If an unauthorized program attempts to write to any files (including creating new files) the action will now be blocked and the user will receive a toast notification like the one in the following screenshot:
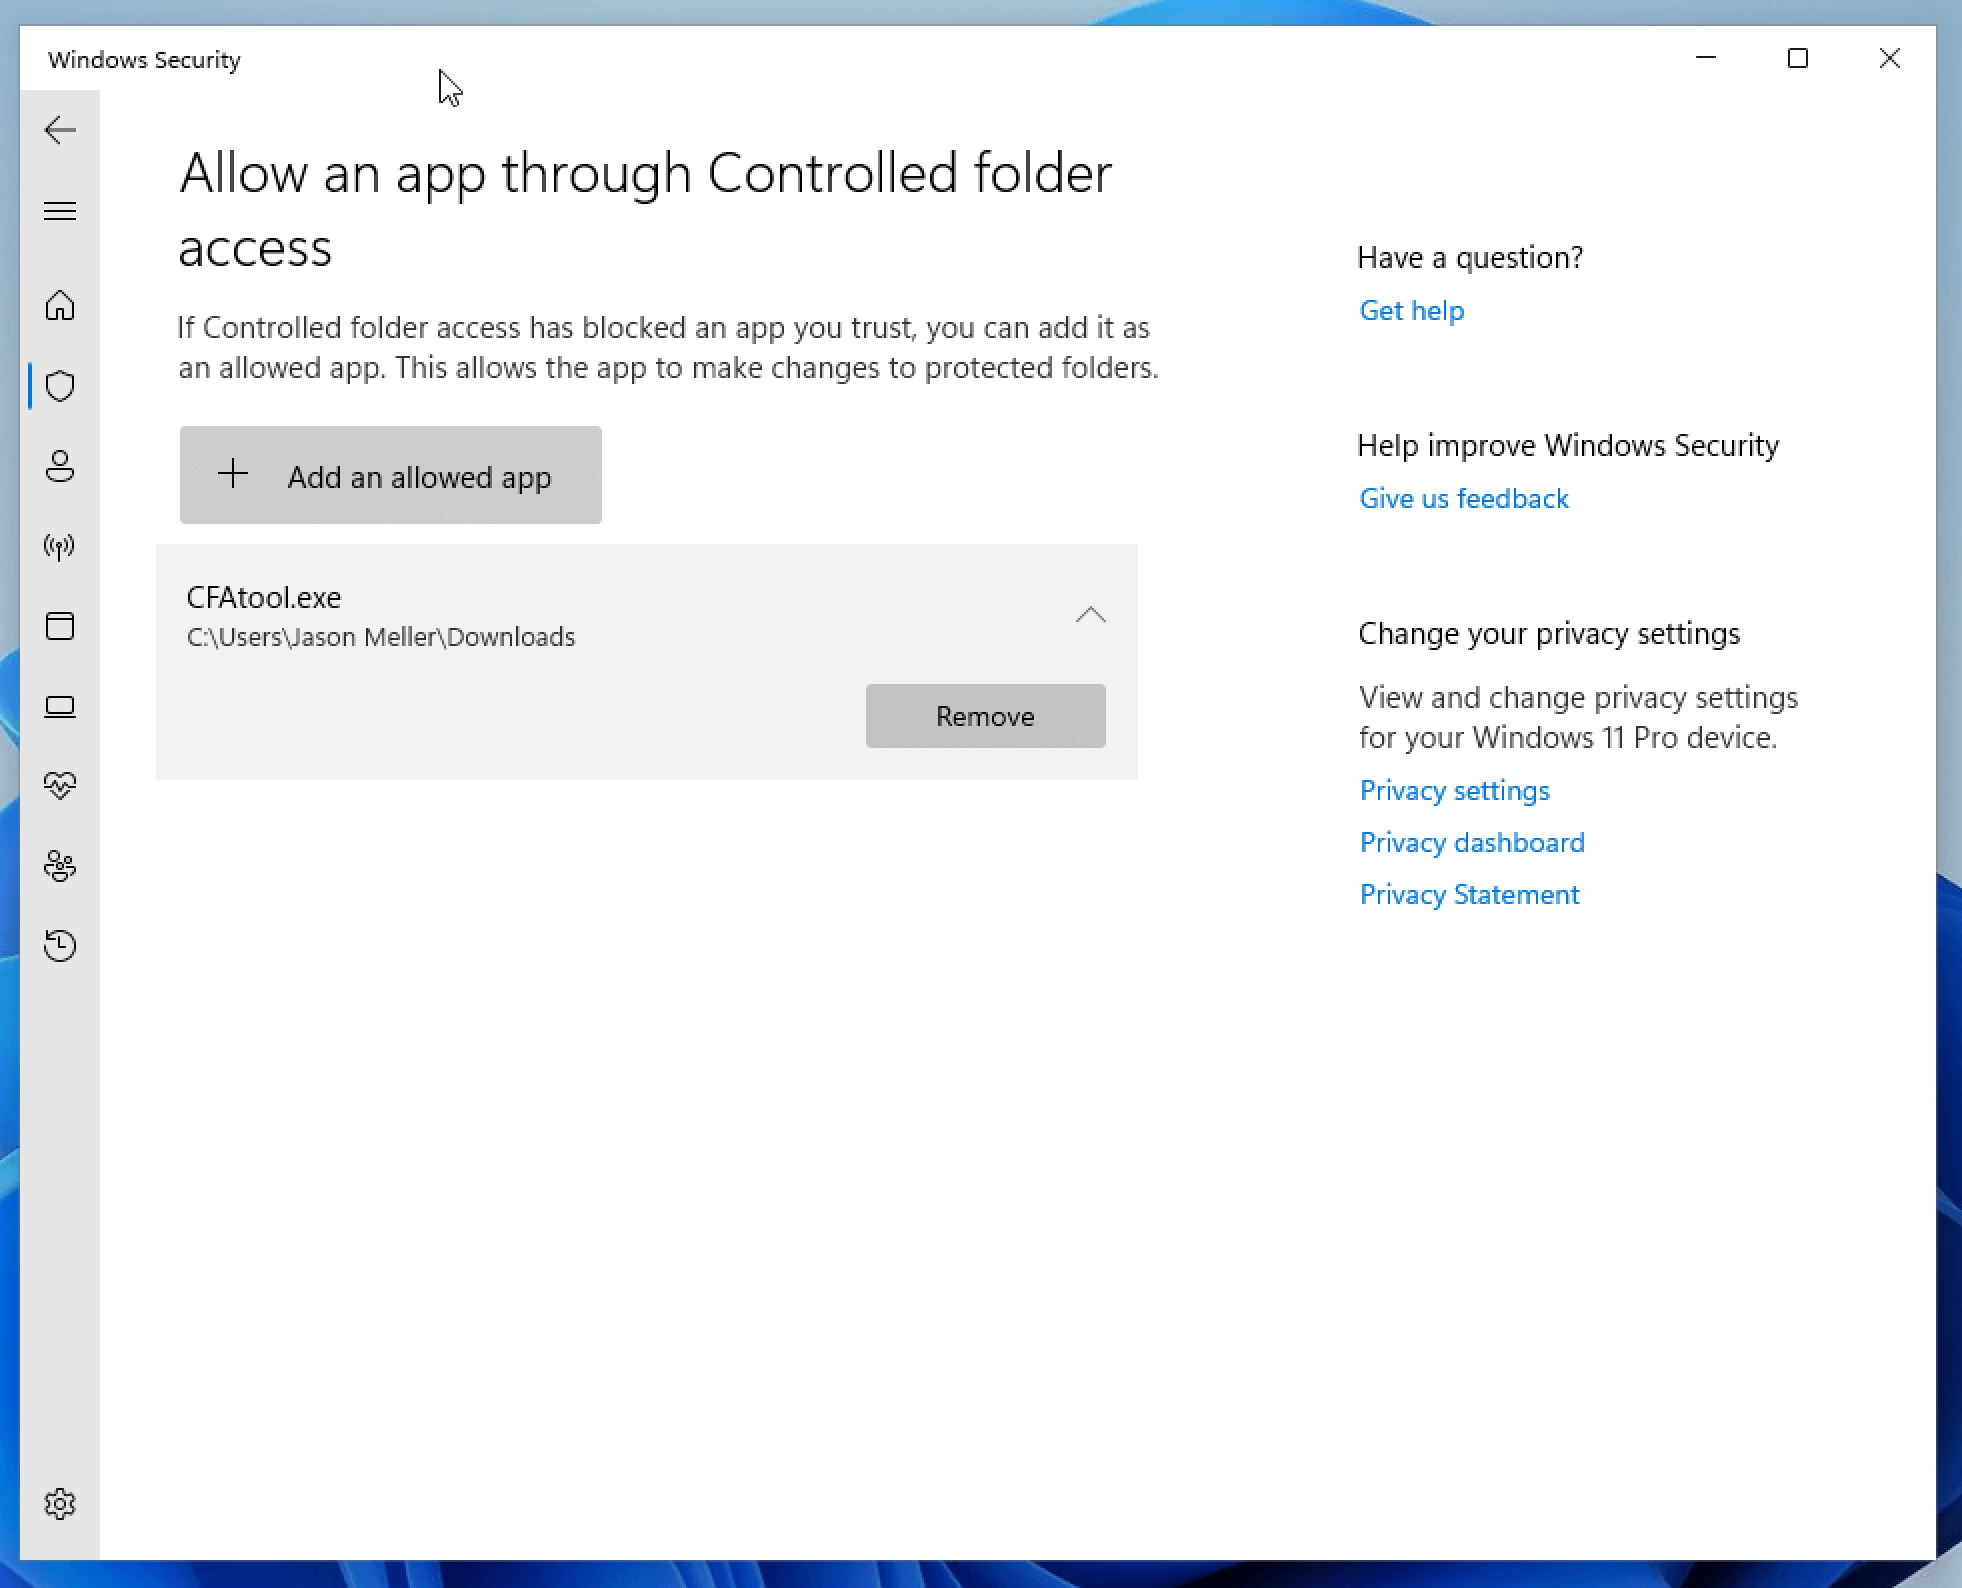
You can review these notifications in more detail from within the Protection History section of the Windows Security control panel.
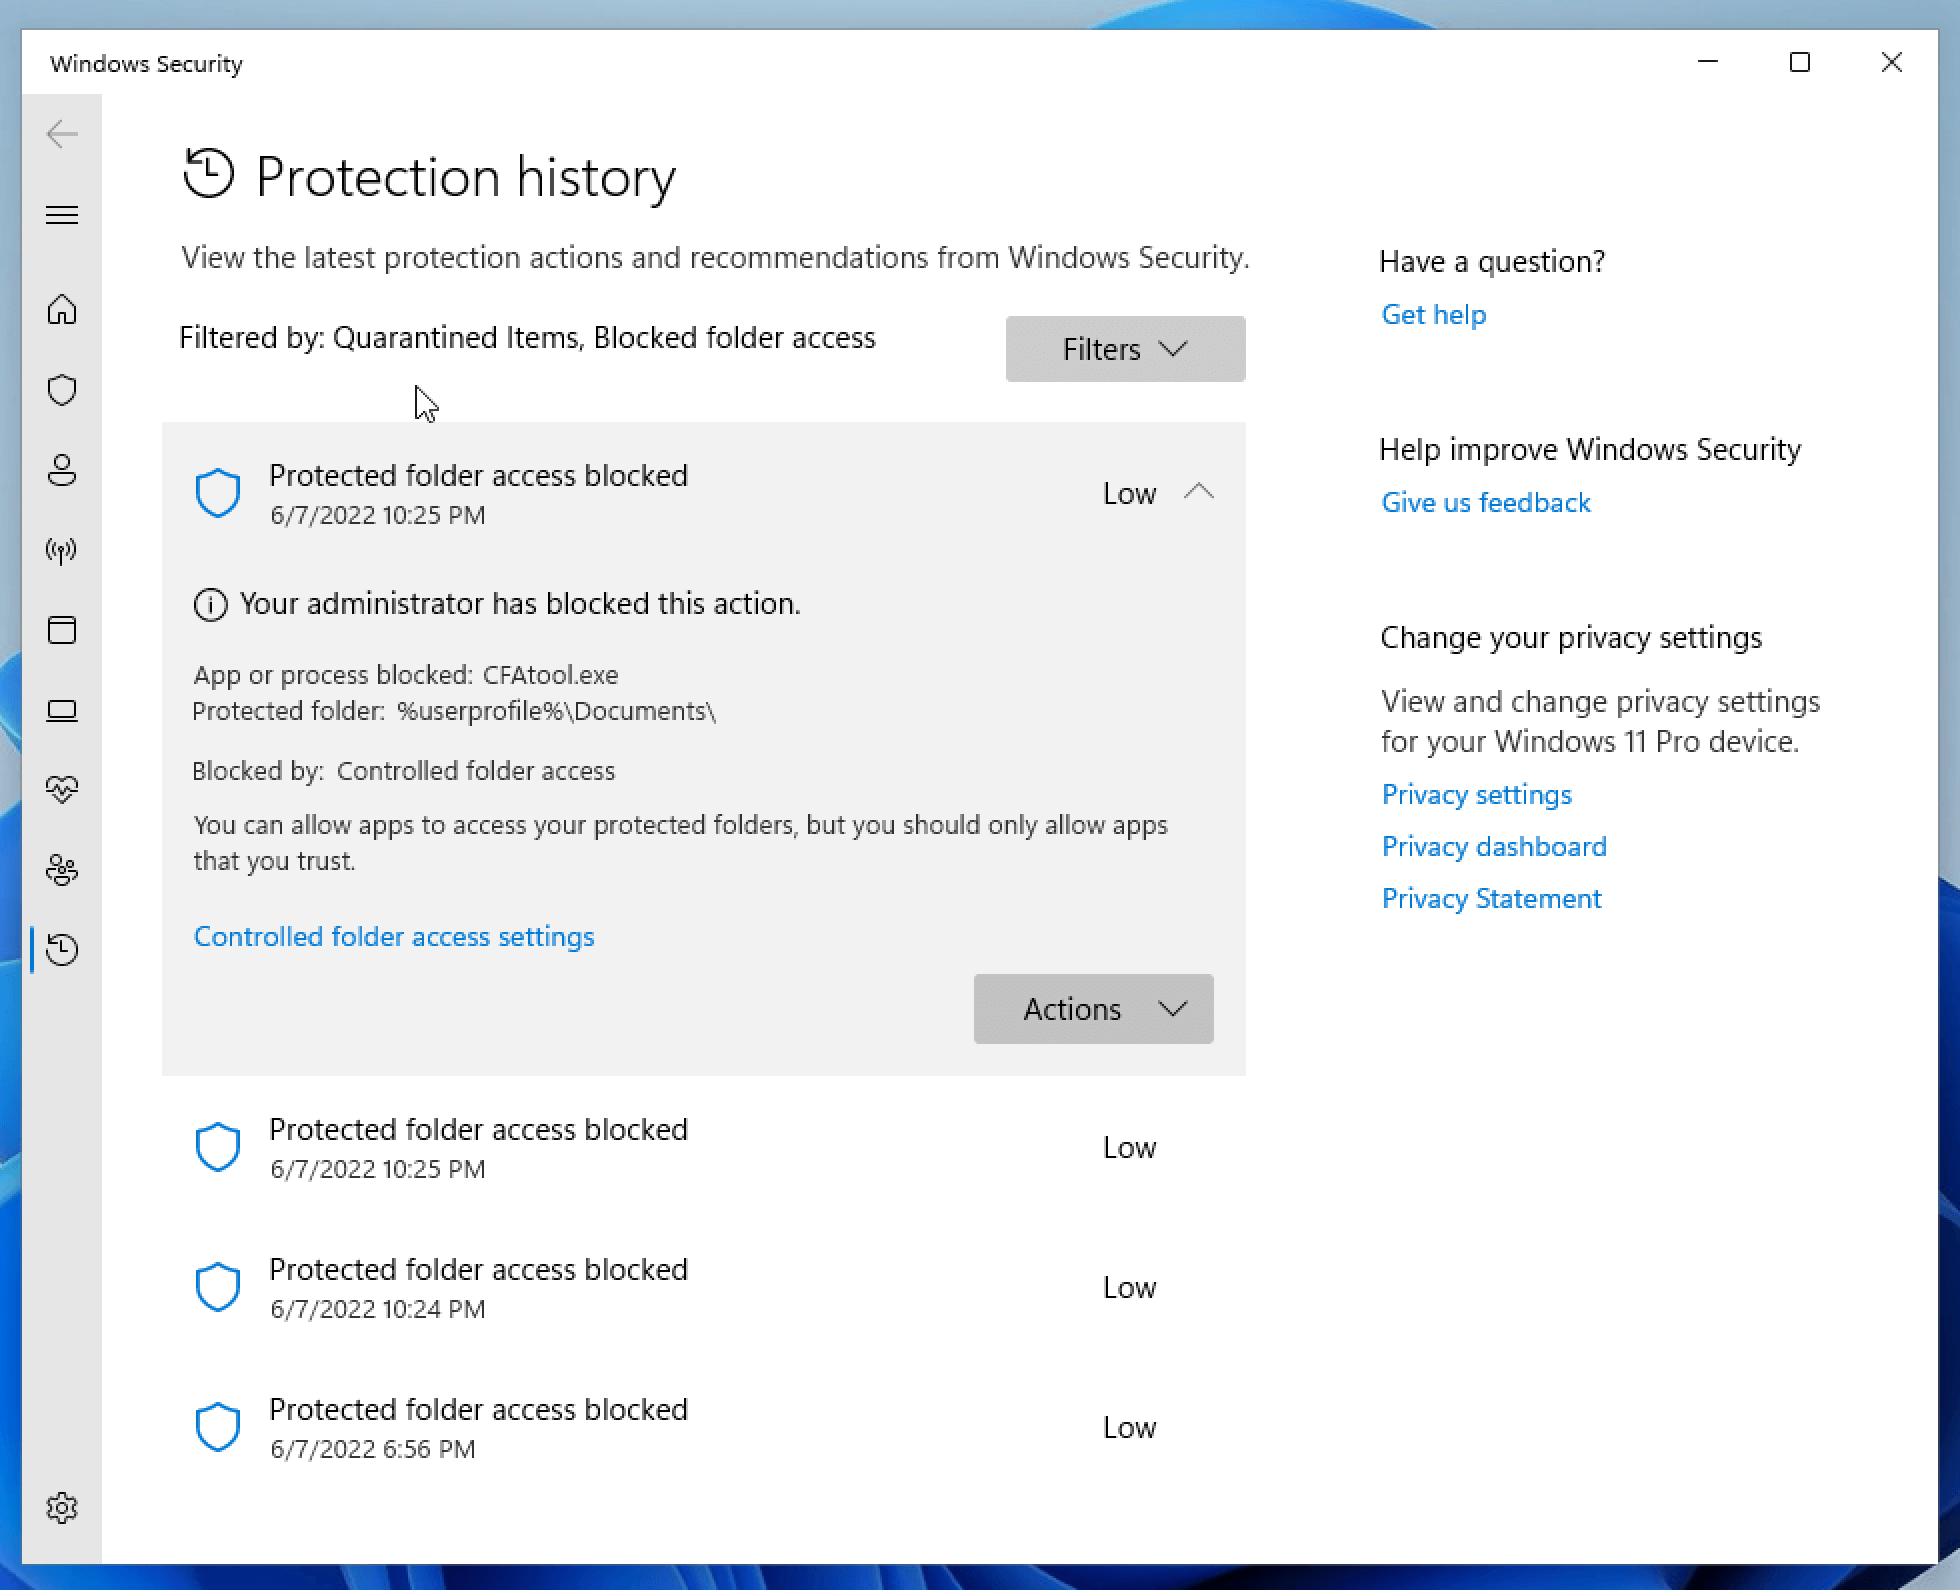
From here, you can choose to add the offending program to the allow list.
How To Turn Controlled Folder Access
As mentioned earlier, Controlled Folder Access is not enabled by default so it’s important that you turn it on right away. To do so:
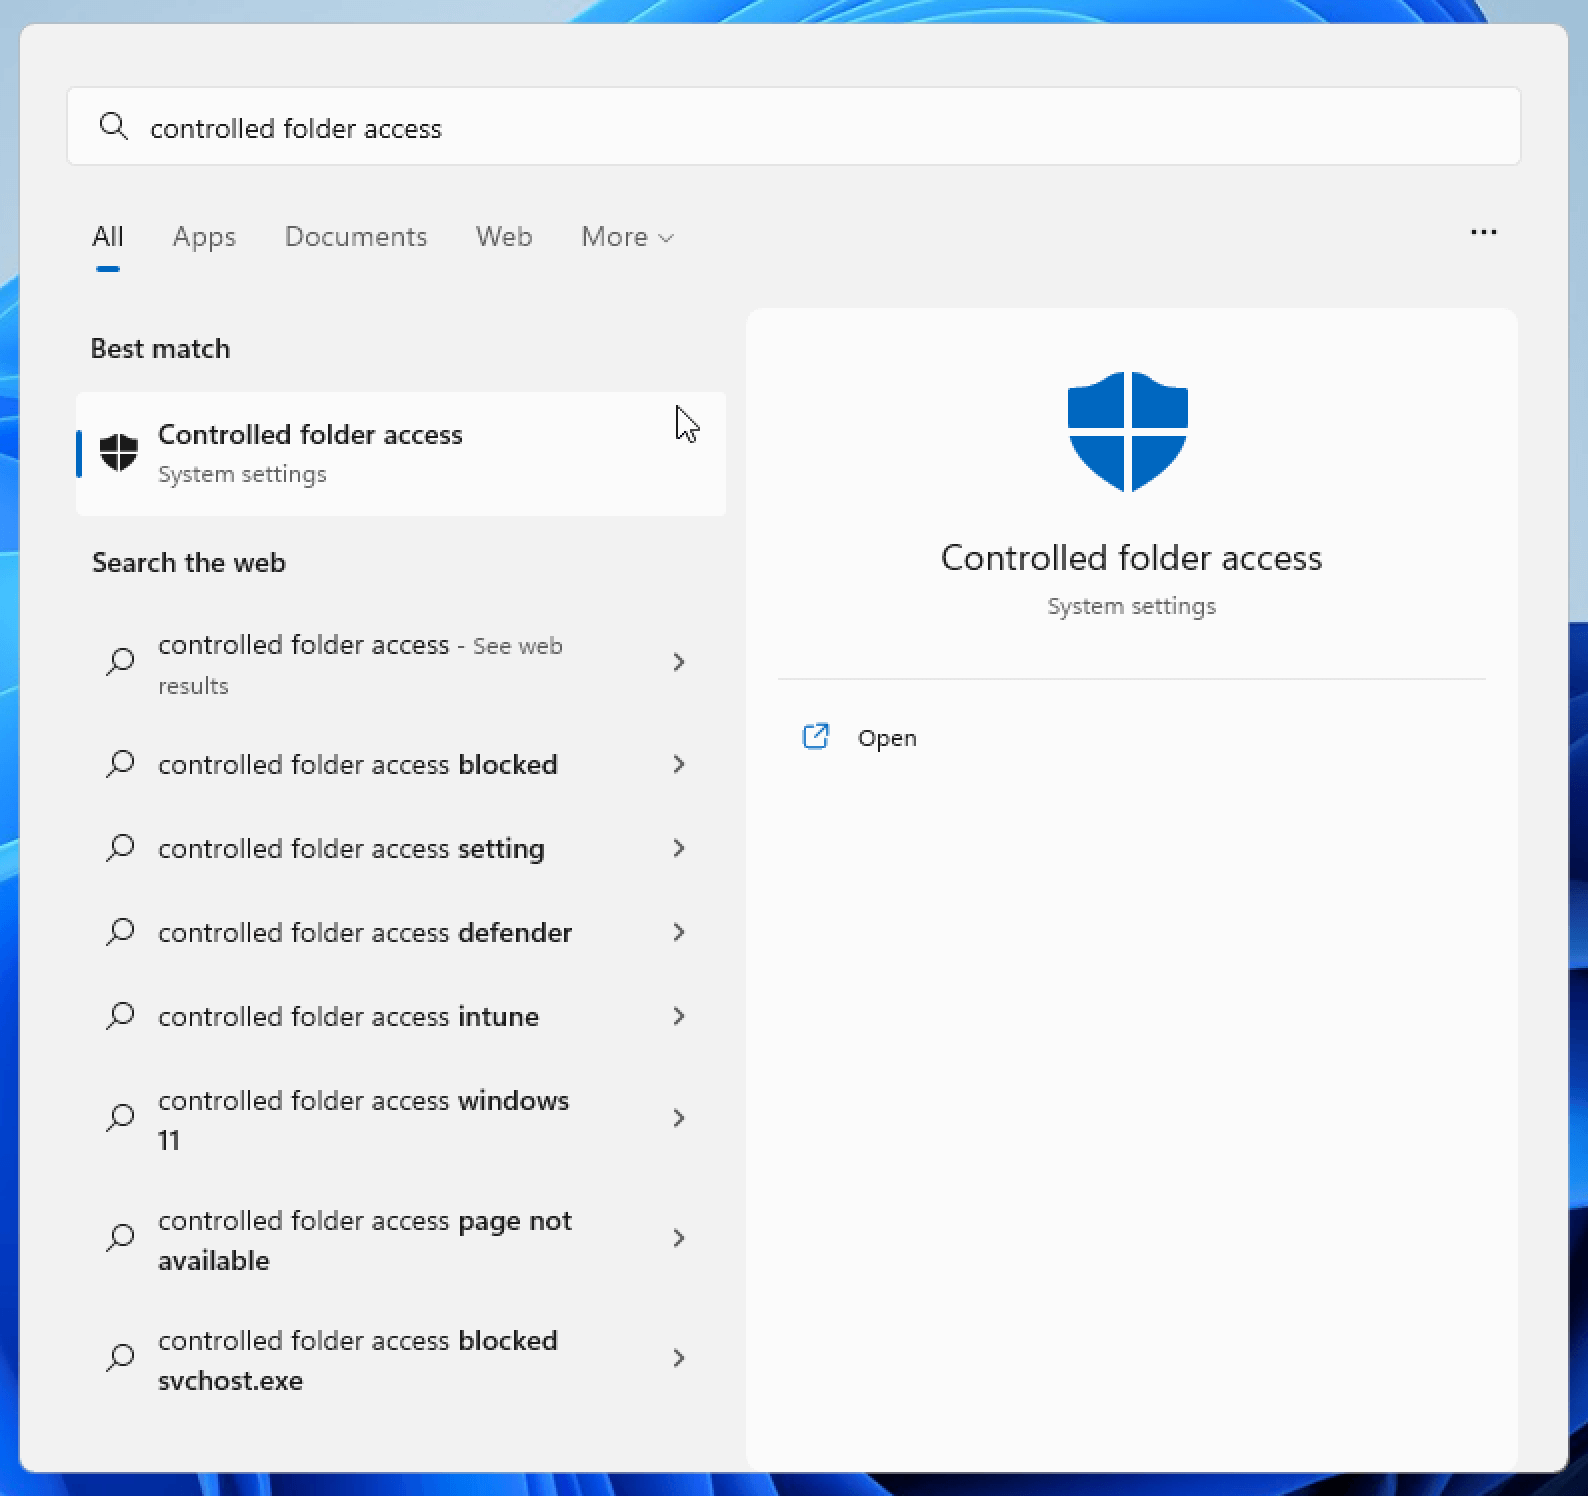
Open the Windows Start Menu Search Bar and type Controlled Folder Access
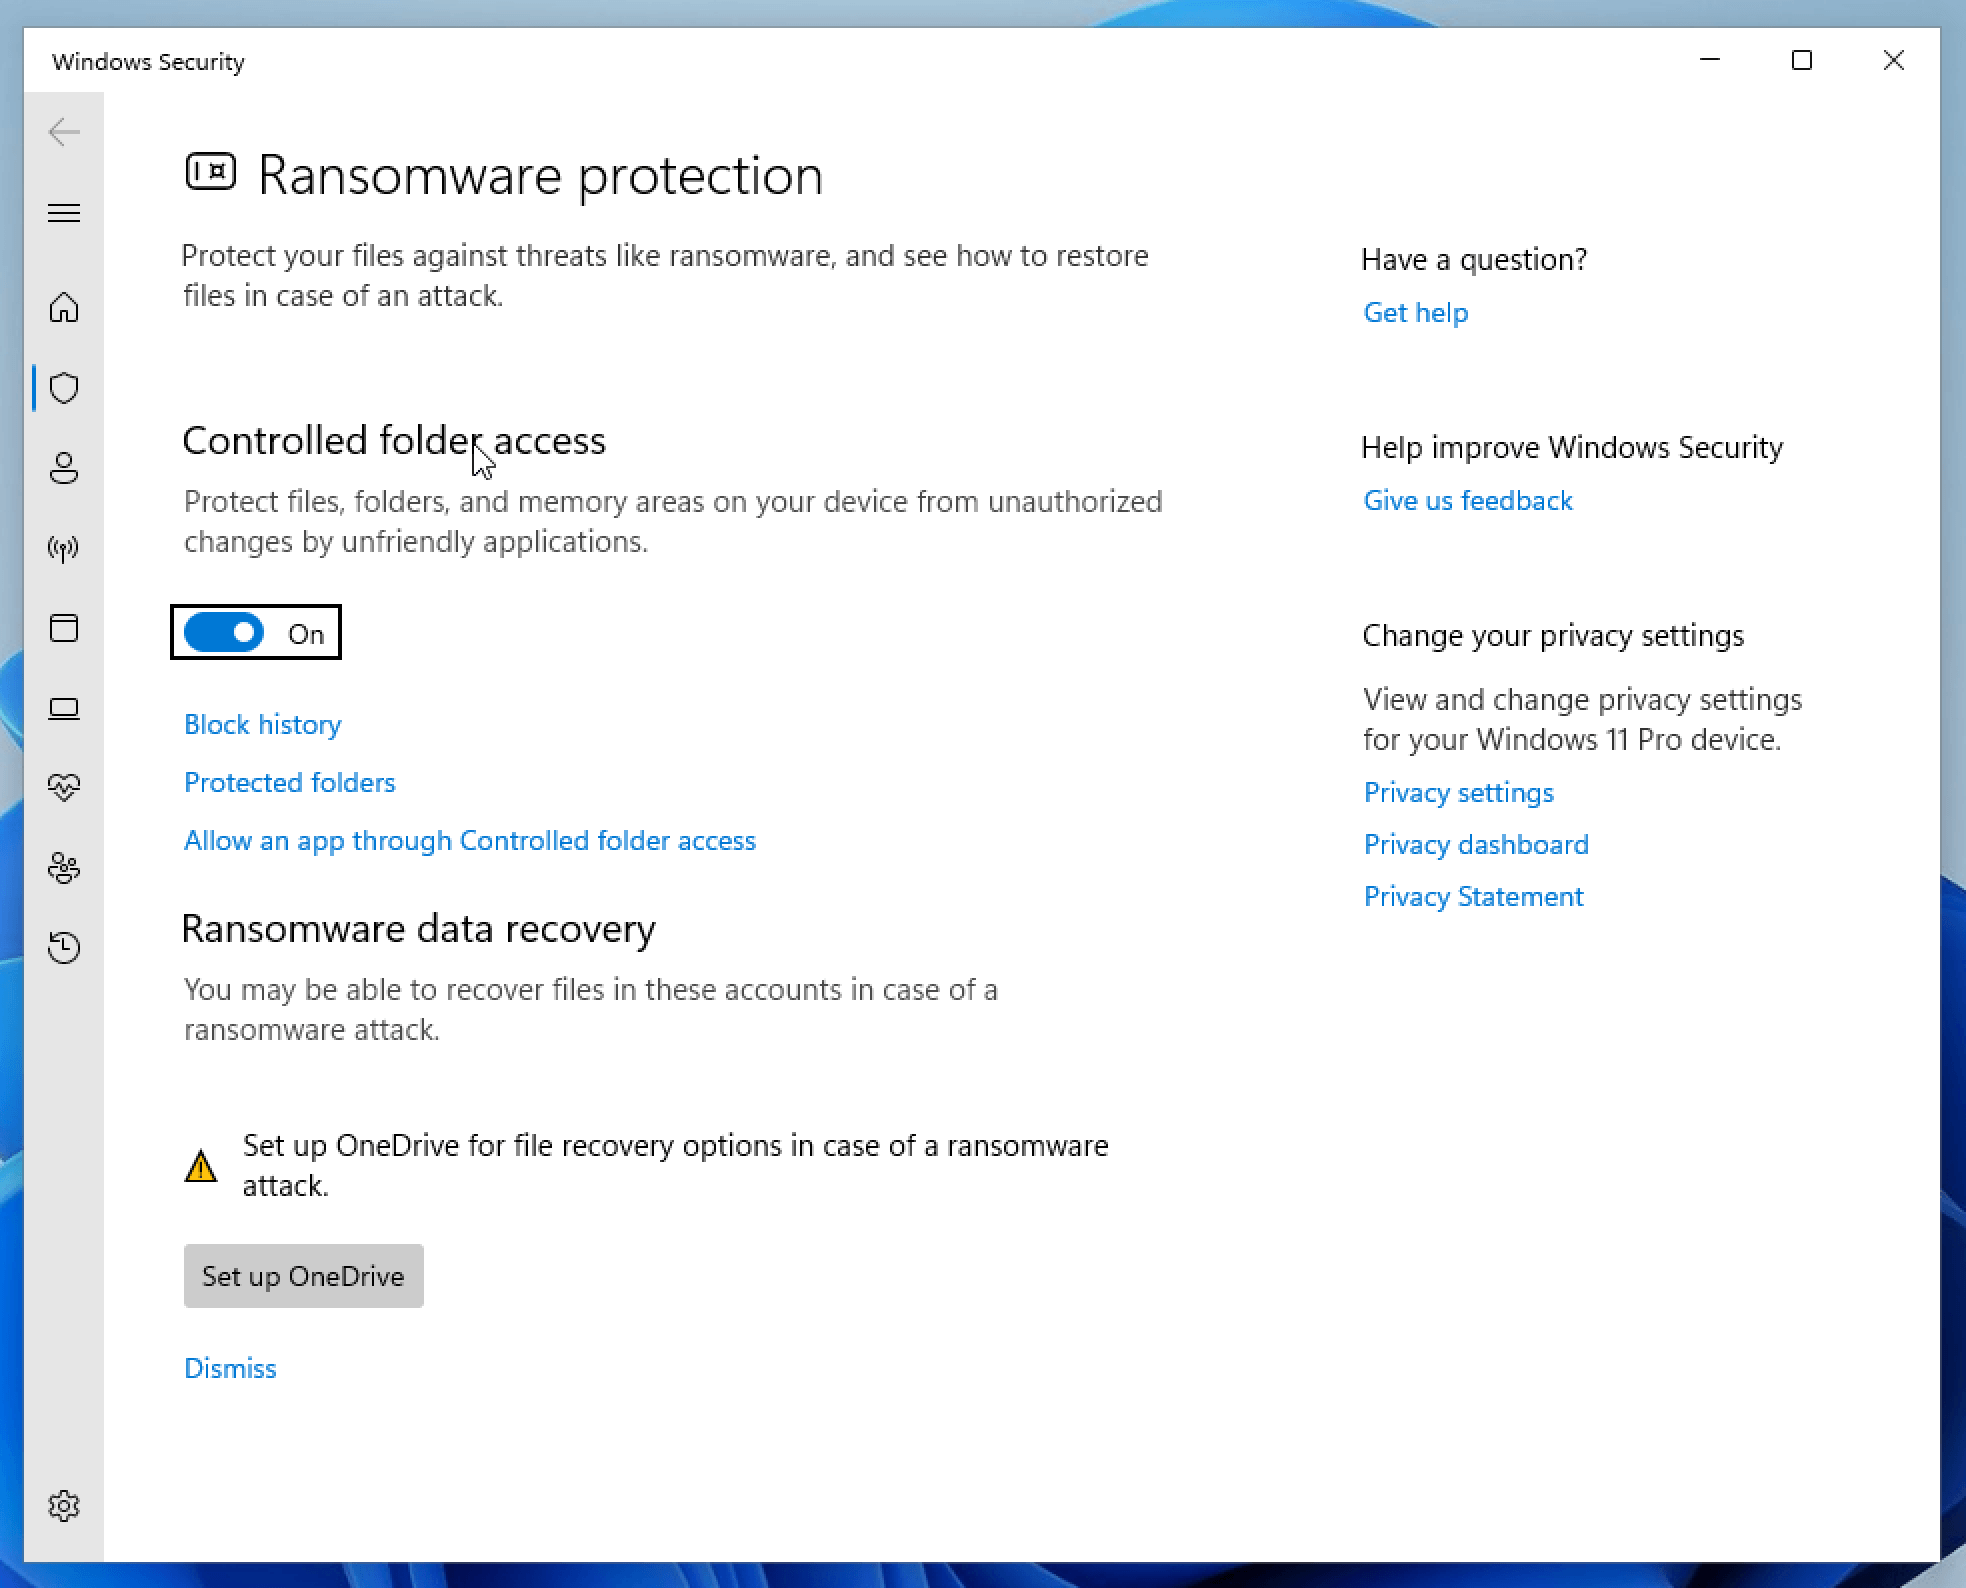
Flip the toggle switch to the “On” position
You can also turn Controlled Folder Access via the following Powershell command
Set-MpPreference -EnableControlledFolderAccess Enabled
How To Programmatically Detect If Controlled Folder Access is Enabled
The best way to programmatically determine if Controlled Folder access is
enabled is via the Get-MpPreference PowerShell cmdlet.
$Preferences = Get-MpPreference
$Preferences.EnableControlledFolderAccess
Here is how you interpret the output:
- 0 - Controlled Folder Access is Disabled.
- 1 - Controlled Folder Access is in Audit-Only mode.
- 2 - Controlled Folder Access is Enabled.
Alternatively, you can also access this same data via WMI:
Get-WmiObject -Namespace "root/microsoft/windows/defender" -Query "SELECT EnableControlledFolderAccess FROM MSFT_MpPreference"
How Does Kolide Remediate This Problem?
Automatically remediating this issue isn't necessarily the best way to go. Instead, consider following the Honest Security approach by blocking devices from authenticating to SaaS apps until they've fixed the problem.
Kolide's Okta Integration does exactly that. Onece integrated in your sign-in flow, Kolide will automatically associate devices with your users' Okta identities. From there, it can block any device that exhibits this problem and then provide the user, step-by-step instructions on how to fix it. Once fixed, Kolide immediately unblocks their device. Watch a demo to find out more.