How to Ensure Ubuntu’s Unattended Upgrades Are Turned On
Enabling Unattended Upgrades ensures critical software on Ubuntu remains patched automatically. It's a must-have.
What Are Unattended Upgrades?
The Unattended Upgrades feature of Ubuntu (and other Debian-based distros) ensures that important security patches for installed packages are automatically downloaded and installed without needing any manual intervention from an end-user (hence the word unattended).
A common misconception about this feature, is that when enabled, it will cause your device to regularly automatically restart. This is not true unless you specifically opt-in to that behavior by going through the following steps:
- Opening the
/etc/apt/apt.conf.d/50unattended-upgradesconfig file - Explicitly setting
Unattended-Upgrade::Automatic-Reboot "true" - Installing the optional
update-notifier-commonpackage.
For more information, please read Ubuntu’s Documentation.
Do I Really Need Unattended Upgrades?
Like most things on Linux, there are strong debates for and against enabling Ubuntu’s unattended upgrades package.
The primary argument against a solution like unattended-upgrades is that
by automatically upgrading packages on a Linux device, one day, a less stable
package may install and cause stability or user-experience issues.
While this argument is technically valid, the fact remains
that without this package installed and enabled, it’s more far more likely that
a Linux device will host software with severe and remotely exploitable security
vulnerabilities. This is especially true for end-user devices running Linux.
Further bolstering the argument for turning it on, Canonical (the creators of Ubuntu)
has opted to pre-install the unattended-upgrades package and enable it across
the Ubuntu operating system. We highly recommend users keep this setting on.
How To Enable Unattended Upgrades
From the User Interface (Gnome Desktop)
By default, Ubuntu Desktop installations include an app called Software & Updates
(internally referred to as update-manager). This program is capable of
modifying the requisite files on your device to ensure Unattended Upgrades
are correctly enabled.
To use it, simply follow these steps.
Launch the Software & Updates app (you can also run
update-managerfrom the terminal).Once opened, select the Updates tab.
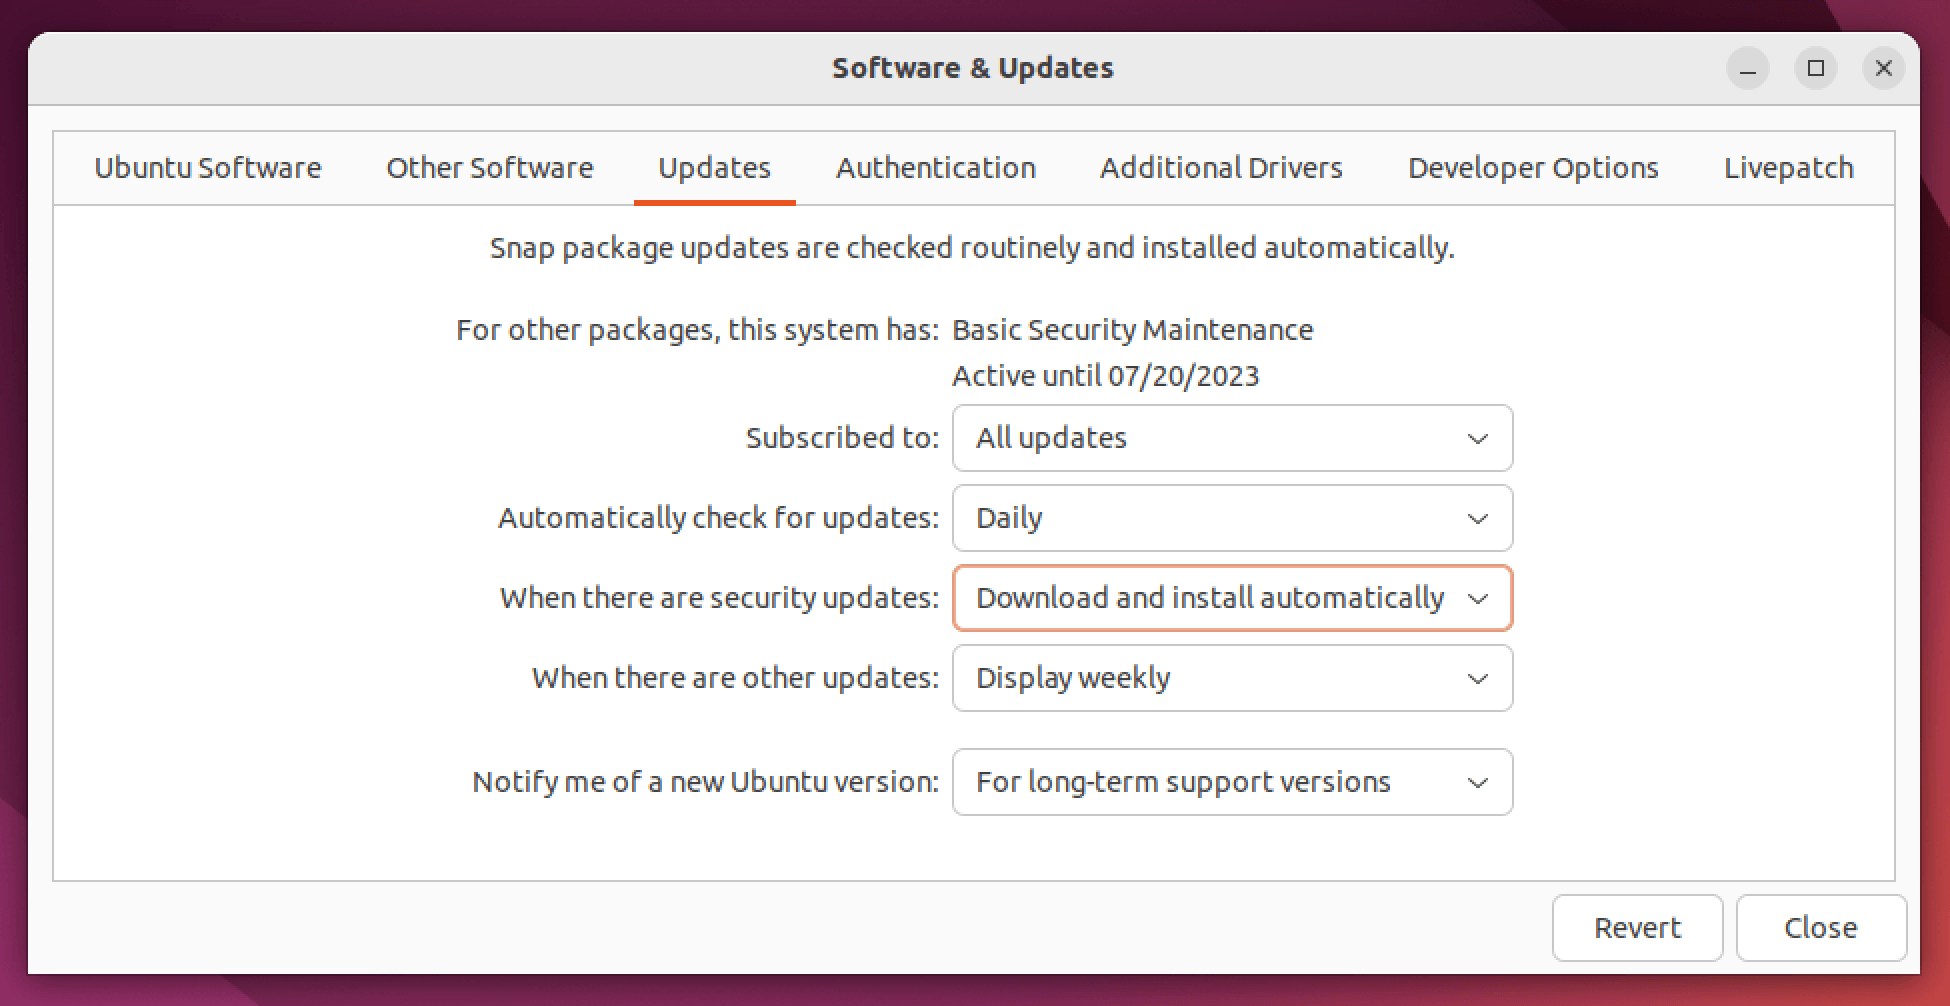
Ensure the When there are security updates option is set to Download and install automatically. Complete any authentication prompts if they are displayed.
Click Close.
From the Terminal
Verify the package is installed with
sudo apt-get install unattended-upgrades -yRun
sudo dpkg-reconfigure -plow unattended-upgradeswhich will then display the following interactive prompt: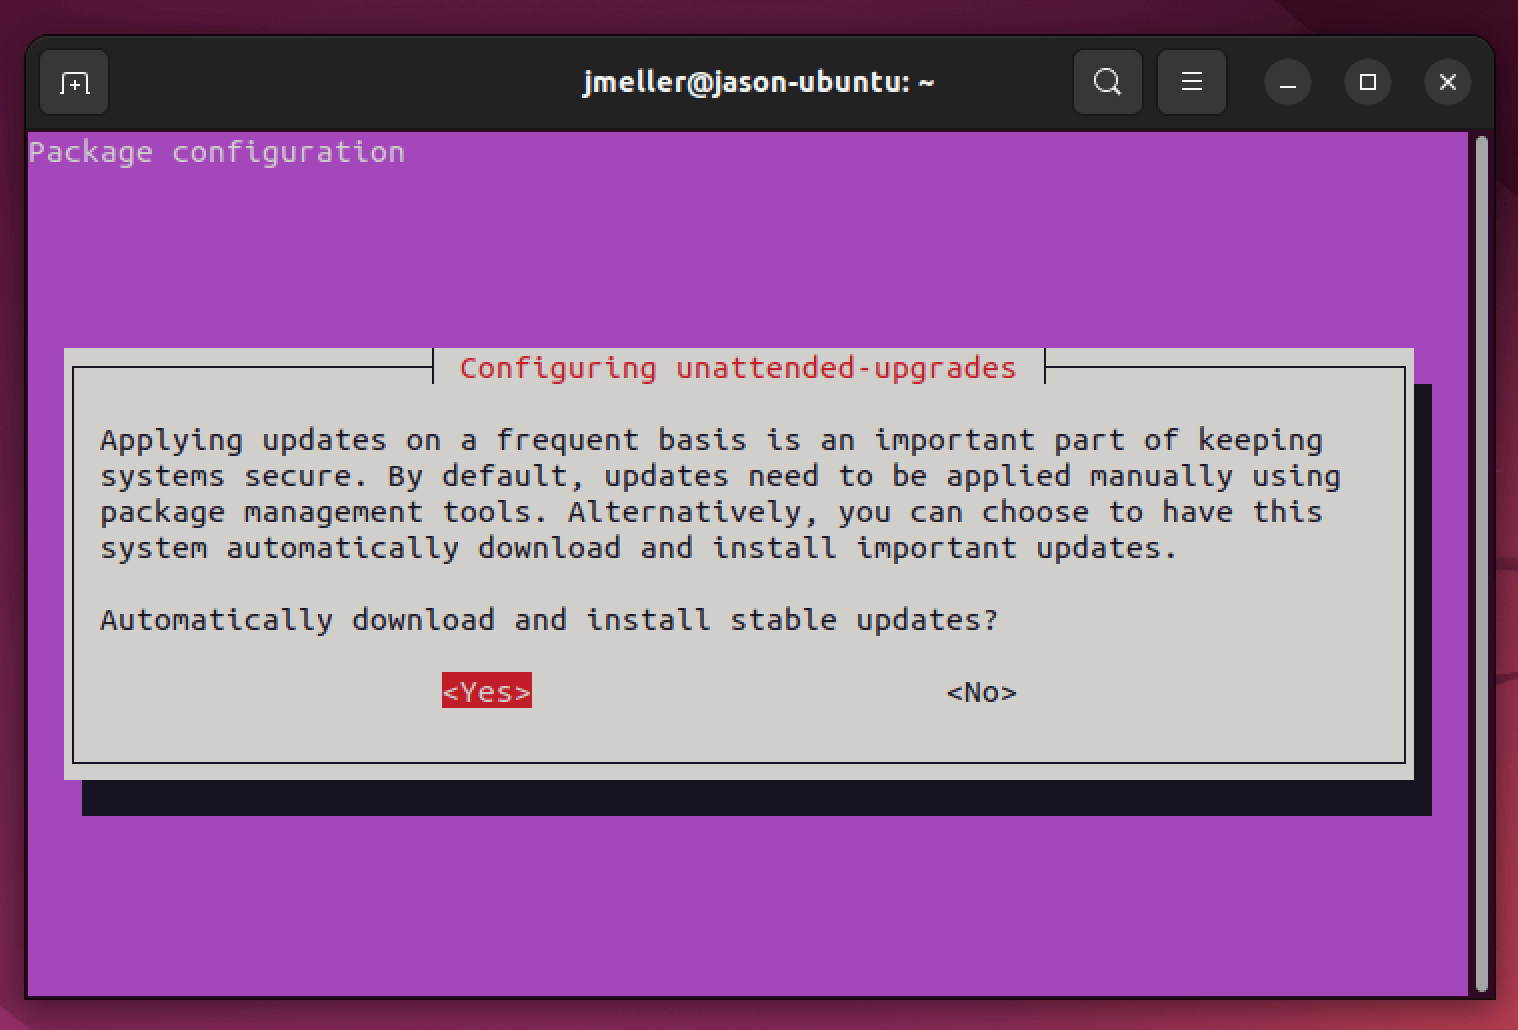
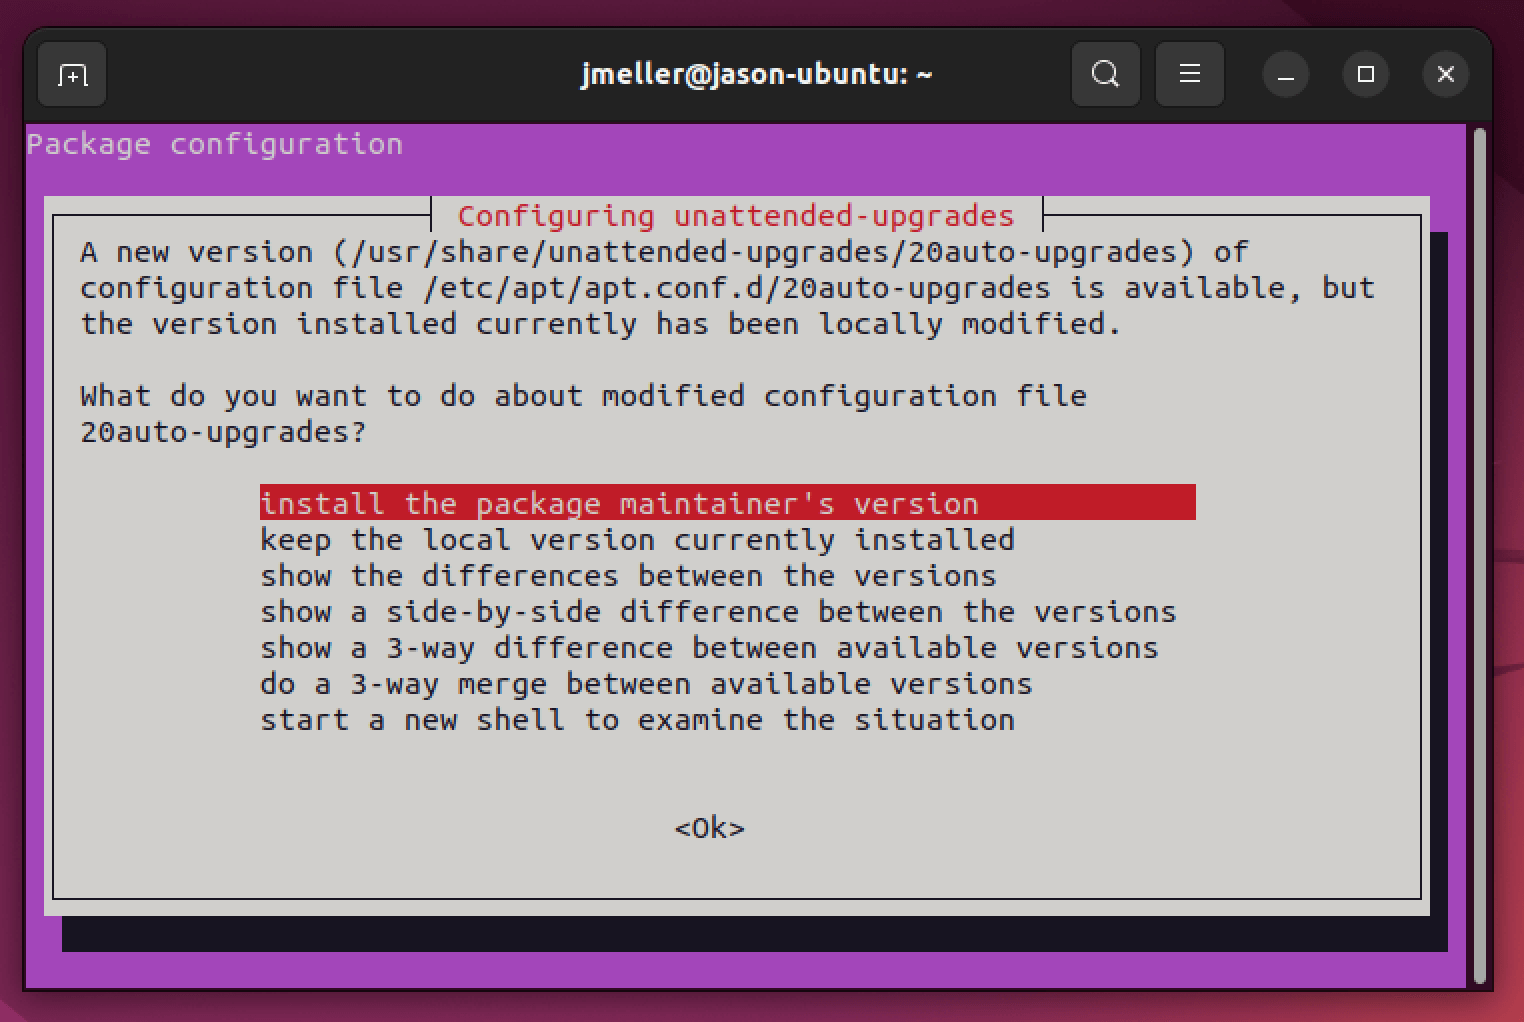
Select yes. Once completed, the app will create the file
/etc/apt/apt.conf.d/20auto-upgradeswith the correct settings. There may be an existing/conflicting installation screen that looks like the screenshot below. If you see that screen, simply replace the file with the new version to get the default behavior.
How To Determine If Unattended Upgrades Is Enabled with Osquery
Osquery (an open-source tool for querying the state of the OS) is capable of
reading the contents of specific configuration files like
/etc/apt/apt.conf.d/20auto-upgrades using an integration with the Augeas
configuration parsing project.
Osquery uses SQL to query the system’s current state. Assuming you have the correct lense installed, you can use Osquery SQL you can use the following query to get the determine if Unattended upgrades is configured correctly.
SELECT
  MAX(CASE WHEN label='Update-Package-Lists' THEN value END) as update_package_list,
  MAX(CASE WHEN label='Unattended-Upgrade' THEN value END) as unattended_upgrade,
FROM augeas
WHERE path = '/etc/apt/apt.conf.d/20auto-upgrades'
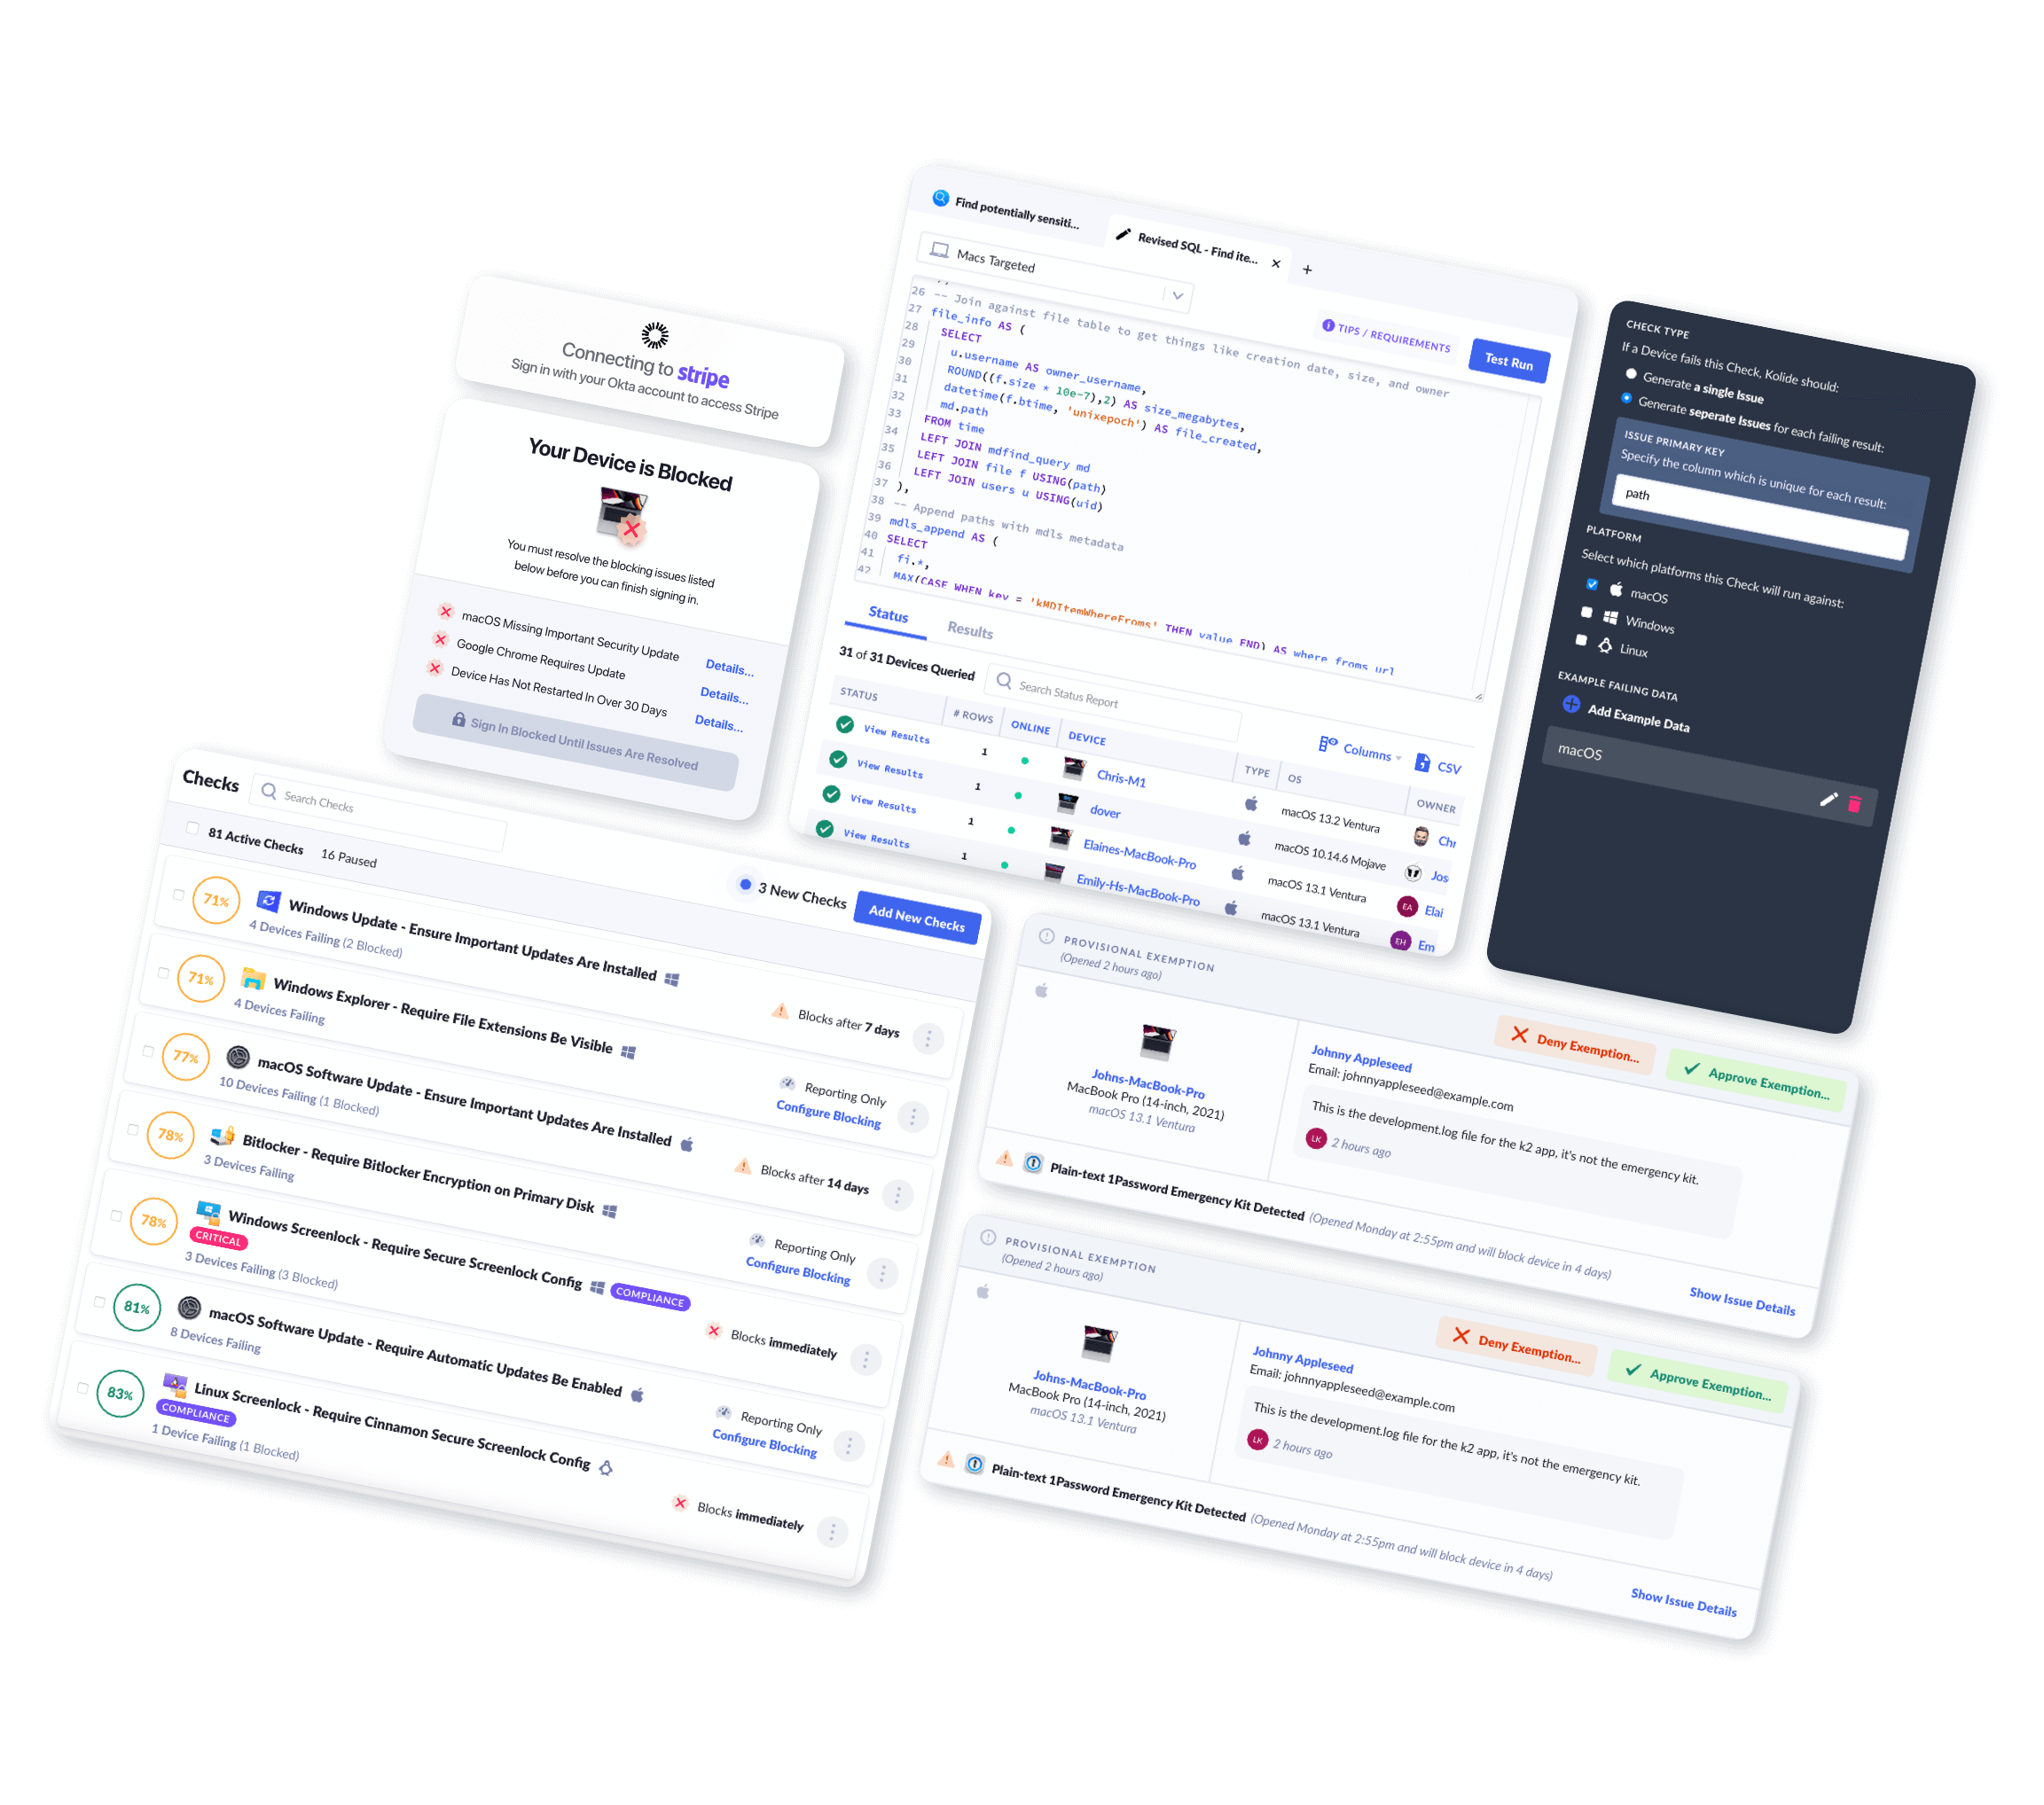
How Does Kolide Remediate This Problem?
This problem cannot be remediated through traditional automation with tools like an MDM. You need to be able to stop devices that fail this check form authenticating to your SaaS apps and then give end-users precise instructions on how to unblock their device.
Kolide's Okta Integration does exactly that. Onece integrated in your sign-in flow, Kolide will automatically associate devices with your users' Okta identities. From there, it can block any device that exhibits this problem and then provide the user, step-by-step instructions on how to fix it. Once fixed, Kolide immediately unblocks their device. Watch a demo to find out more.